
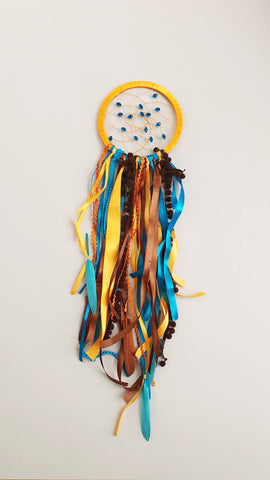
How to make a dreamcatcher tutorial
If you want to make a dreamcatcher for the first time, this step-by-step tutorial is the perfect place to start this DIY project!
The first dreamcatcher I made was a few years ago with my daughter Emily. She was only 4 years old at that time but wanted to make one. So we did it together. The middle weaving part was on me of course, but she enjoyed helping and choosing the ribbons. But let's get to the tutorial part now!

What materials are needed to make a dreamcatcher?
- Hoop
- Strong thread
- Colorful ribbons
- Feathers
- Beads (optional)
All this is included in our DIY dreamcatcher kits. You just need to choose your color variation here.
How to make a dreamcatcher?
STEP 1: Wrap the dreamcatcher’s hoop
The first step is to wrap a wide ribbon around the wooden hoop. You want to be sure that you’ve done it evenly and tightly.
When you get back to the start, fix the ribbon with a double knot as shown in the picture below. Don’t cut it off completely. You can shorten it if you like. This will be the bottom of the dream catcher

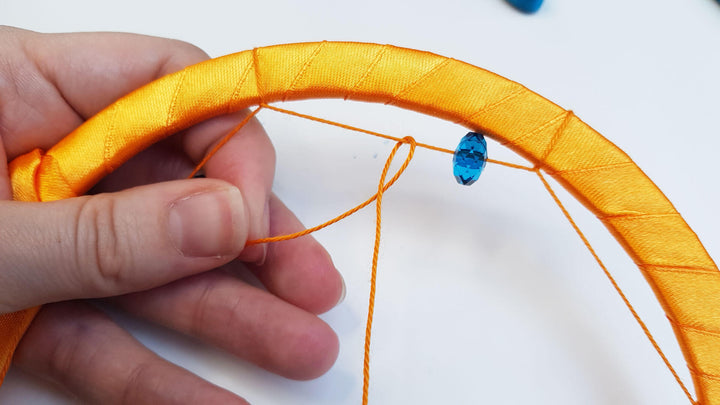
STEP 2: Weave the middle of the dreamcatcher
Then go ahead and take the thread. You can add beads if you like to add some accents to the middle. You can use a threader to do this if you like.


Tie it with a tight knot next to the wide ribbon knot.
Now you are starting to create the weave. You will loop it around the ring 8 times. So You need to make knots evenly dividing the hoop into 8 parts.
You will make the same knot all along: put the thread around the hoop and back through the hole you just formed. Now make the next knot. Insert beads from time to time, but don’t use all of them in the first round.

Make the last knot on the first round tightly together with the first one.
Now you will make the second round. You will make knots not on the hoop, but in between the knots of the first round. Find the middle point of your first two knots and loop the string around the same way as in the first round.
Make sure that knots are in between the two knots.
The next rounds are made the same as the second one. Keep working to the center of the dreamcatcher.
When you reach the center, make a tight double knot so your weaving is fixed.


Congrats – you just created the middle part of your dream catcher.

STEP 3: Add ribbons and feathers
Now the easy part – take the rest of the ribbons, cut them in different lengths, and tie them to the bottom of the dreamcatcher. I suggest tying them like this. It helps the ribbons to stay straight and looks better than a basic double knot.

Put as many ribbons as you like.
Next tie colorful feathers. First, tie the knot and then put the feather inside and fix the knot. You can also use a glue gun if you like.

The last step is to add a string to the top of your dreamcatcher so you can hang it above your bed or any other place you like.
Hope you enjoyed this tutorial. Let me know if you have any questions!
If you want to order a complete dreamcatcher kit, check our color options HERE.
Have a nice craft!
-Agrita