
DIY dreamcatcher with yarn
This DIY craft idea is perfect for using yarn scraps and nature materials.
Materials you will need for this DIY dreamcatcher project:
- Small wooden brunch
- Yarn or ribbon scraps
- Scissors
- Tape (can use thread or yarn instead)

How can your child make a dreamcatcher at home?
STEP 1. Let’s go for a walk and find a not-too-thick tree branch. If it is too thick, it will break when bending the circle. How long to choose? The longer the branch, the bigger the dream catcher you can make. So this decision is up to you.
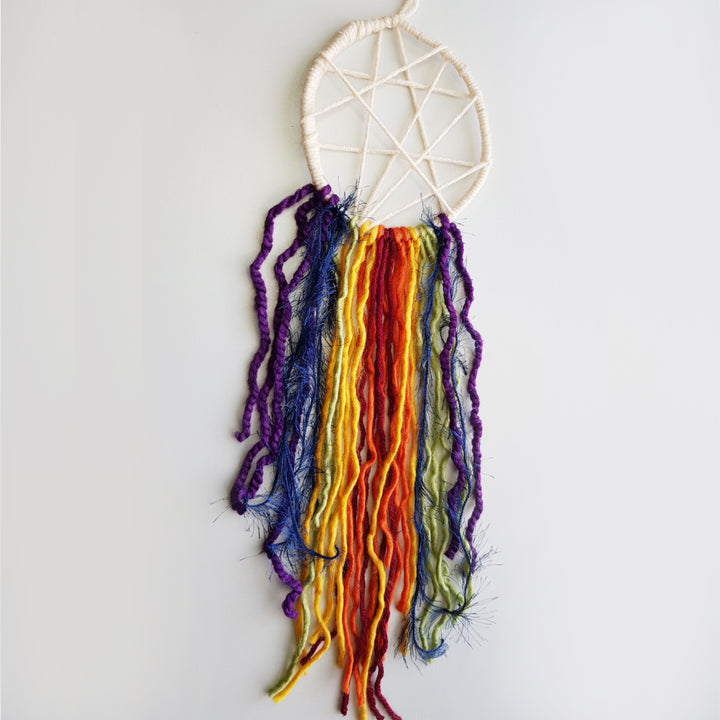
STEP 2. Make a circle from the branch. How to do it? Fold the branch so that both ends overlap (as in the photo) and use adhesive tape to stick them together so that the circle does not fall apart. Instead of tape, you can also use stronger thread or yarn, wrapping it several times around the branches and tying it.

STEP 3. Take the yarn or ribbon you have chosen for the base and start winding around the created circle. Tie carefully so that the branch is not visible. It will make your dream catcher look more beautiful.

STEP 4. Once you've wrapped everything around, it's time to weave a pattern in the middle of the dream catcher. If you plan to make the middle in a different color, tie a knot to the first thread and cut off the end.

I chose to make the middle in the same color, so I started to create the pattern without cutting. The easiest way to create a pattern is to wind the yarn back and forth around the frame. Even younger children will easily master it!

STEP 5. The final step is to tie the colorful yarns at the bottom of the dream catcher. I chose to use rainbow colors.

In addition, you can decorate the dream catcher with feathers or beads using a glue gun.

Good luck in the creative process!